Introduction: The Importance of Caulking Around Your Toilet
Bathroom maintenance is crucial for ensuring that your living space remains hygienic, functional, and aesthetically pleasing. One of the essential but often overlooked aspects of bathroom maintenance is caulking around the toilet. Properly caulking around your toilet not only enhances the appearance of your bathroom but also prevents potentially damaging leaks. A well-caulked toilet helps to keep water from seeping into the floor and subfloor, which can lead to mold, mildew, and structural damage over time. This article provides a comprehensive, step-by-step guide on how to caulk around your toilet for a leak-free bathroom, helping you maintain a clean and safe environment.
Gathering Your Materials and Tools
Before you start caulking around your toilet, it’s important to gather all the necessary materials and tools to ensure a smooth process. You will need a caulking gun, a tube of silicone-based or mildew-resistant bathroom caulk, a utility knife, a roll of painter’s tape, a clean rag, rubbing alcohol, and a caulk smoothing tool or your finger for finishing. Having all these items on hand will save you time and make the task more manageable. Silicone-based caulk is generally recommended for bathrooms due to its durability and water-resistant properties, but make sure to choose a product that specifies its use for bathroom settings to prevent future issues.
Preparation: Cleaning the Area
Preparing the area is a critical first step in ensuring that the caulk adheres properly and provides a complete seal. Begin by thoroughly cleaning the base of the toilet and the surrounding floor area. Use a bathroom cleaner to remove any dirt, grime, and previous caulk residue. If you’re dealing with old, stubborn caulk, a utility knife or caulk remover can help scrape it off effectively. Follow this by wiping down the area with a cloth soaked in rubbing alcohol to eliminate any remaining soap scum, oils, or residues that might hinder the new caulk’s adhesion. Let the area dry completely, as moisture can prevent the caulk from forming a proper seal.
Applying Painter’s Tape for Clean Lines
To achieve professional-looking results, applying painter’s tape around the base of the toilet is highly recommended. This step helps create clean, straight lines and prevents excess caulk from getting onto the floor or the toilet. Place the tape about 1/4 inch away from the edge of the toilet base on both sides. Doing so ensures that you have a consistent caulk line that looks neat and uniform. The painter’s tape acts as a guideline, making it easier to apply the caulk precisely where you want it. Take your time with this step to ensure the tape is applied evenly, as it will greatly influence the final result.
Cutting the Caulk Tip and Loading the Caulk Gun
With your area prepped and taped, the next step is to prepare the caulk tube for application. Using a utility knife, cut the tip of the caulk tube at a 45-degree angle. The size of the opening should be small enough to control the flow but large enough to fill the gap around the toilet base. Once cut, insert the tube into the caulking gun and secure it in place. Press the release lever to prepare for application, and apply a small amount of caulk initially to ensure it’s flowing smoothly. This preparation step ensures that your caulking application will be controlled and consistent, making the actual process much easier.
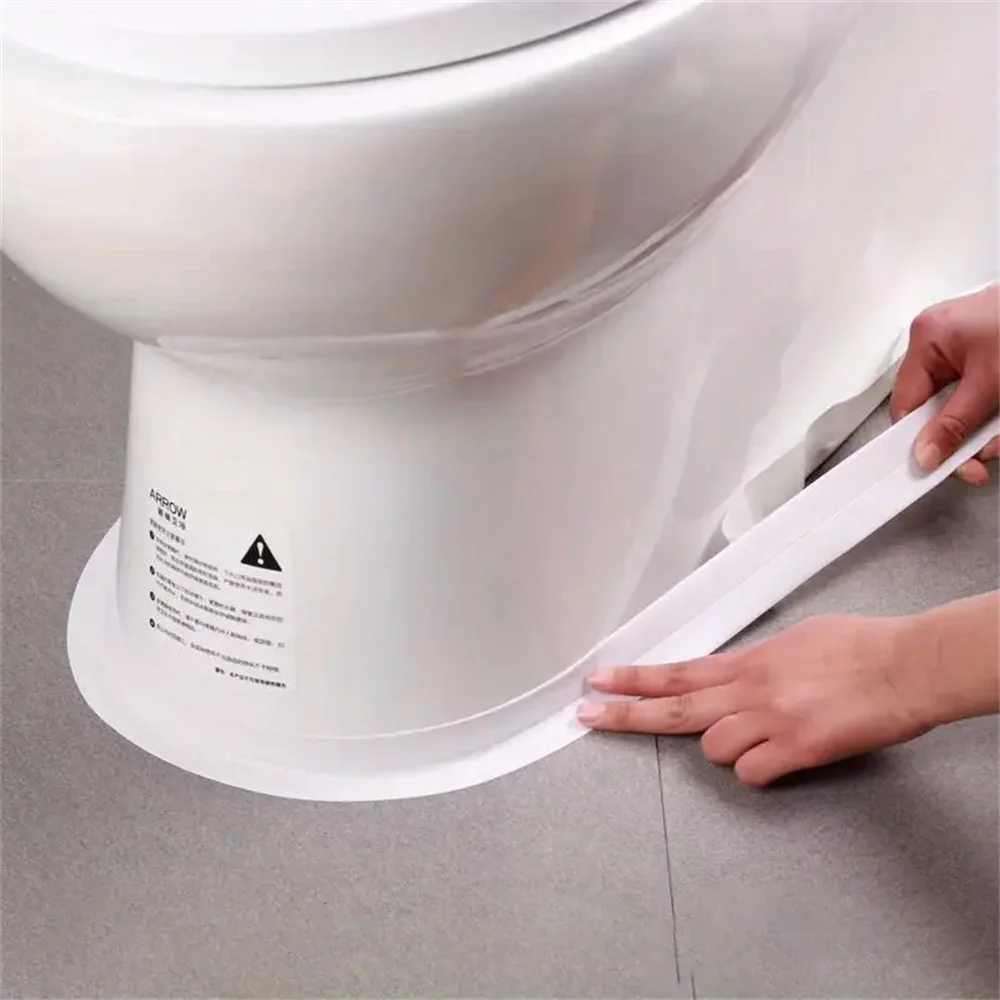
Applying the Caulk: Slow and Steady
Now comes the crucial step of applying the caulk around the base of the toilet. Hold the caulking gun at a 45-degree angle to the gap between the toilet and the floor, and start from one side, applying steady pressure to the trigger. Move the gun slowly and steadily around the base, ensuring an even bead of caulk fills the gap completely. It’s essential to maintain a consistent speed and pressure to avoid an uneven application. If you’re new to caulking, don’t worry about getting it perfect on the first pass; you can always smooth it out later. The goal here is to ensure that there are no gaps or breaks in the caulk line, which could lead to leaks.

Smoothing the Caulk for a Professional Finish
After applying the caulk, the next step is to smooth it out for a clean, professional finish. This process, known as tooling, helps to ensure a complete seal and improve the appearance of the caulk line. You can use a caulking tool designed for this purpose or simply your finger. If using your finger, it’s a good idea to keep it slightly wet to prevent the caulk from sticking to your skin. Gently run the tool or your finger along the bead of caulk, pressing it into the gap and smoothing it out. This action will also help to remove any excess caulk. For corners and tight areas, using your finger can offer more precision and control.
Removing the Painter’s Tape
Once you have smoothed out the caulk, it’s time to remove the painter’s tape. Do this carefully and slowly to avoid pulling up any of the freshly applied caulk. The best approach is to pull the tape back on itself at a 45-degree angle, which helps to create a crisp, clean line. Removing the tape while the caulk is still wet ensures that it doesn’t adhere to the tape and pull away from the gap. If you notice any spots where the caulk is uneven or has gaps after removing the tape, you can touch them up immediately while the caulk is still pliable.
Allowing the Caulk to Cure
After successfully applying and smoothing the caulk, allow it to cure properly. The curing time can vary depending on the type of caulk used, but it generally takes around 24 hours for silicone-based caulk to set fully. During this period, avoid using the toilet or getting the area wet to ensure the caulk forms a strong, reliable seal. It’s a good idea to keep the bathroom well-ventilated by opening windows or using a fan, as this helps the caulk cure effectively. Patience is key at this stage; rushing the process can compromise the caulk’s integrity and performance.
Regular Maintenance and Inspection
To maintain a leak-free bathroom, regular maintenance and inspection of the caulk around your toilet are essential. Over time, caulk can deteriorate or become discolored due to moisture and cleaning products. Periodically inspect the caulk line for any signs of cracking, peeling, or mold growth. If you notice any issues, it’s best to address them immediately to prevent further damage. Cleaning the caulk line with mild soap and water can help maintain its appearance and functionality. Should you need to replace the caulk, follow the same steps outlined in this guide to ensure a thorough and effective application.
Troubleshooting Common Issues
Despite careful application, you might encounter some common issues when caulking around your toilet. One potential problem is air bubbles in the caulk, which can usually be smoothed out during the tooling process. If the caulk doesn’t adhere properly, it might be due to improper surface preparation or the presence of moisture during application. In such cases, removing the faulty caulk and reapplying it on a clean, dry surface should resolve the issue. For persistent problems, consulting with a professional or using specialized sealants designed for high-moisture environments can provide additional solutions.
Benefits of Proper Caulking
Properly caulking around your toilet offers several benefits beyond preventing leaks. It enhances the overall appearance of your bathroom, giving it a clean, finished look. Caulk also helps to block out mold and mildew by preventing moisture from seeping into areas where it can accumulate and grow. Furthermore, caulking can reduce unpleasant odors that result from standing water and waste buildup. It also provides an added layer of protection against pests that might find their way through gaps around the toilet base. Ultimately, taking the time to caulk around your toilet contributes to a more hygienic, functional, and visually appealing bathroom.
Conclusion: Ensuring a Leak-Free Bathroom with Proper Caulking
Caulking around your toilet may seem like a small task, but it plays a significant role in maintaining a leak-free, hygienic bathroom. By understanding the steps involved—from gathering materials and cleaning the area to applying and smoothing the caulk—you can achieve professional results that enhance your bathroom’s longevity and appearance. Regular maintenance and inspection ensure that the caulk remains effective over time, protecting your home from potential water damage and related issues. With this step-by-step guide, you’re well-equipped to tackle the task confidently, ensuring a leak-free bathroom and peace of mind.