Introduction: Shedding Light on a Common Dilemma
Changing a light bulb in a ceiling fan seems like a straightforward task until you encounter a fixture without visible screws. Fret not! This quick fix guide will walk you through the process of replacing a light bulb in a ceiling fan without screws, allowing you to illuminate your space with ease.
Assessing the Situation: Understanding Your Ceiling Fan Fixture
Before diving into the replacement process, take a moment to familiarize yourself with your ceiling fan fixture. Some models feature light covers held in place by screws, while others utilize alternative mechanisms such as clips or springs. Understanding the design of your fixture will help you determine the best approach for accessing the light bulb.
Gathering Your Tools: Essential Equipment for the Job
While changing a light bulb may not require an extensive toolkit, having the right tools on hand can streamline the process. For this quick fix, you’ll need a sturdy step stool or ladder for reaching the ceiling fan, a pair of gloves for safety, and a replacement light bulb compatible with your fixture. Additionally, keep a flashlight handy for illuminating hard-to-reach areas.
Safety First: Powering Off the Ceiling Fan
Before proceeding with any maintenance or repairs, ensure the ceiling fan’s power supply is switched off. Locate the wall switch or circuit breaker that controls the fan’s electricity and turn it off to prevent accidental shocks or injuries. Confirm that the fan blades have come to a complete stop before proceeding to the next step.
Identifying the Access Points: Finding the Entryway
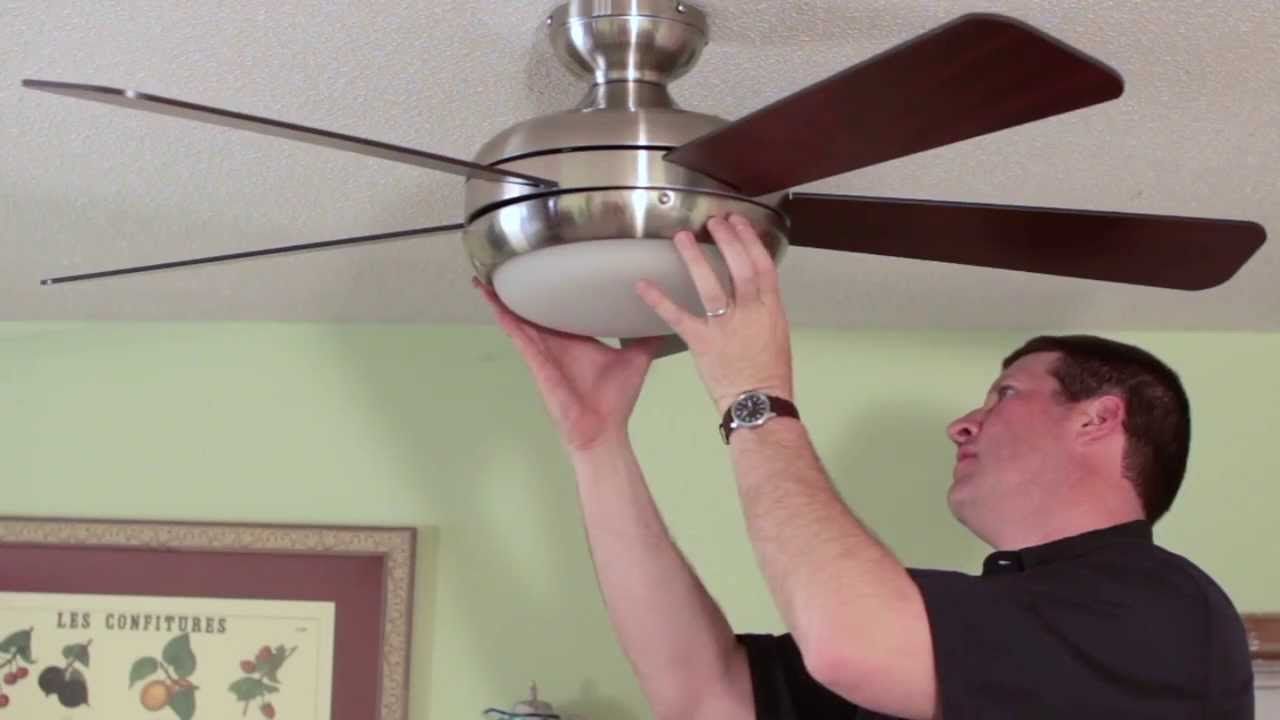
In ceiling fans without visible screws, accessing the light bulb typically involves removing the light cover or globe. Examine the fixture closely to locate any potential access points, such as decorative caps, finials, or trim rings. These components may conceal hidden mechanisms for securing the light cover in place.
Using Pressure Points: Removing the Light Cover
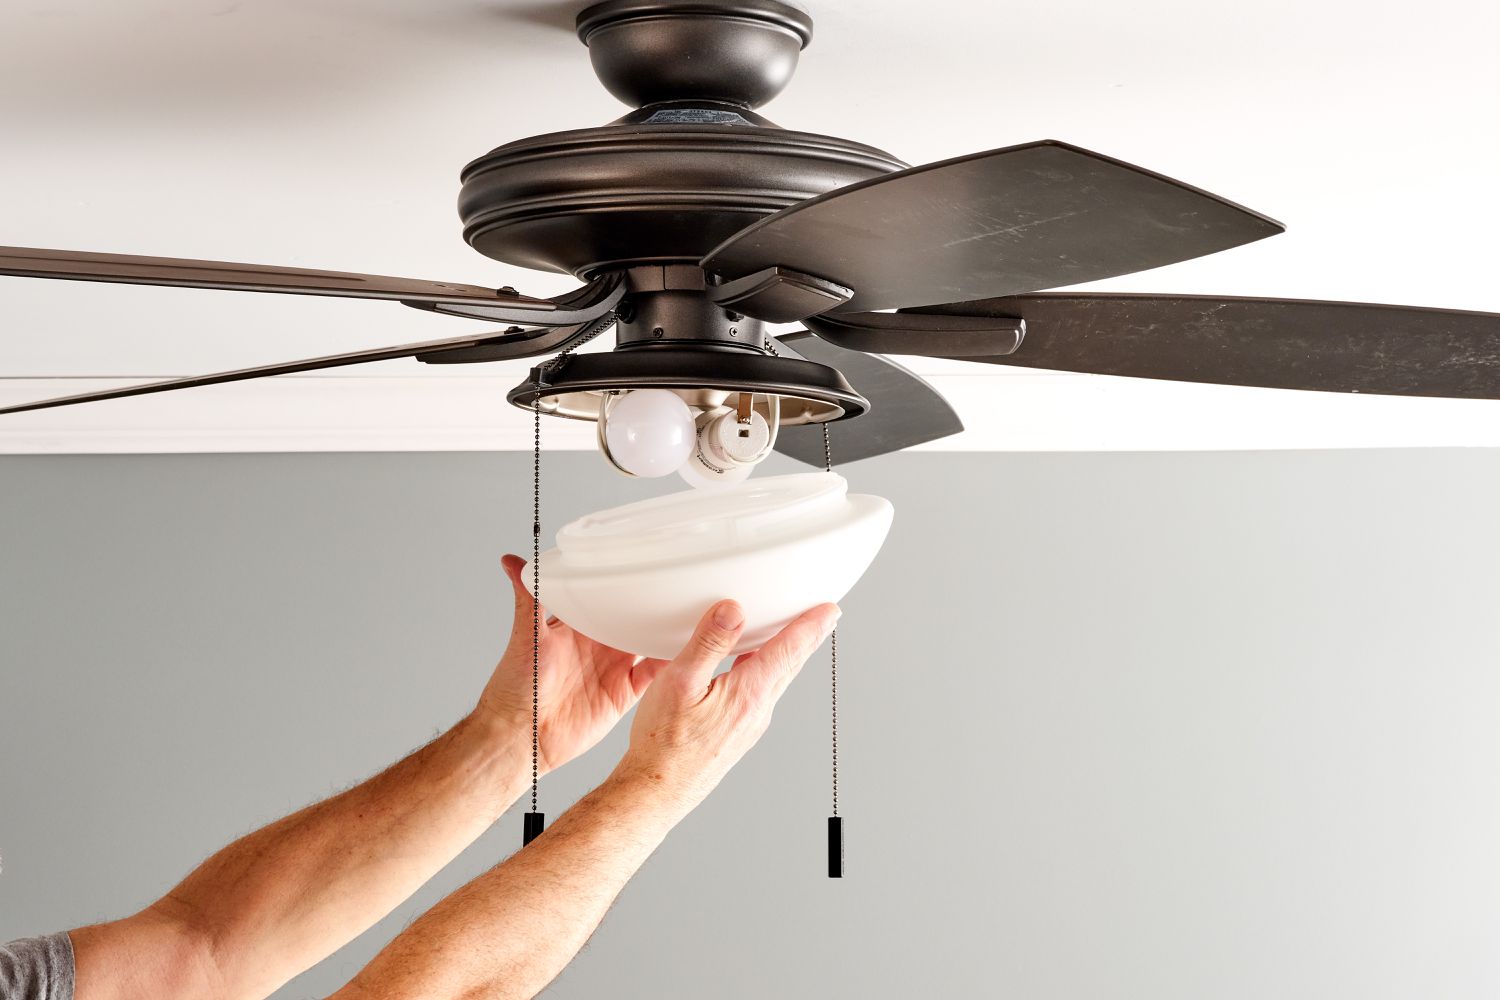
Once you’ve identified the access points, apply gentle pressure or twisting motion to remove the light cover from the ceiling fan. In some cases, the cover may be held in place by friction or spring-loaded clips. Exercise caution to avoid exerting excessive force, as this may damage the fixture or cause injury.
Replacing the Light Bulb: Swapping Out the Old for the New
With the light cover removed, carefully unscrew the old light bulb from its socket and dispose of it properly. Take note of the bulb’s wattage and type to ensure compatibility with the replacement bulb. Insert the new light bulb into the socket, taking care not to overtighten or force it into place.

Securing the Light Cover: Reattaching with Care
Once the new light bulb is in place, align the light cover with the fixture and gently press or twist it back into position. If your ceiling fan utilizes clips or springs to secure the cover, ensure they engage properly to hold the cover in place securely. Double-check for any gaps or misalignment before proceeding.
Testing the Fixture: Restoring Power and Functionality
With the light bulb securely installed and the cover reattached, restore power to the ceiling fan by flipping the wall switch or circuit breaker back on. Turn on the fan’s light function to verify that the new bulb illuminates properly. If everything appears to be in working order, congratulations – you’ve successfully changed the light bulb in your ceiling fan without screws!
Conclusion: Shedding Light on DIY Solutions
Navigating the process of changing a light bulb in a ceiling fan without visible screws may initially seem daunting, but with the right approach and a bit of patience, it’s a task that can be easily accomplished. By assessing the fixture, identifying access points, and utilizing gentle pressure techniques, you can quickly and safely replace a light bulb, restoring brightness to your space in no time. So, the next time you encounter a ceiling fan with a stubborn light cover, remember this quick fix guide and illuminate your surroundings with confidence.


