Transforming your home’s interior with a touch of classic elegance is an aspiration for many homeowners. One understated yet impactful way to achieve this is through the installation of chair railing, a decorative molding that traditionally lines the walls at about one-third their height. Not only does it serve as a protective barrier against chair backs in dining areas, but it also adds depth and sophistication to any room. This comprehensive guide, “Chair Railing Installation 101,” will walk you through the process, ensuring a professional finish that elevates your living space.
Understanding Chair Rail Molding
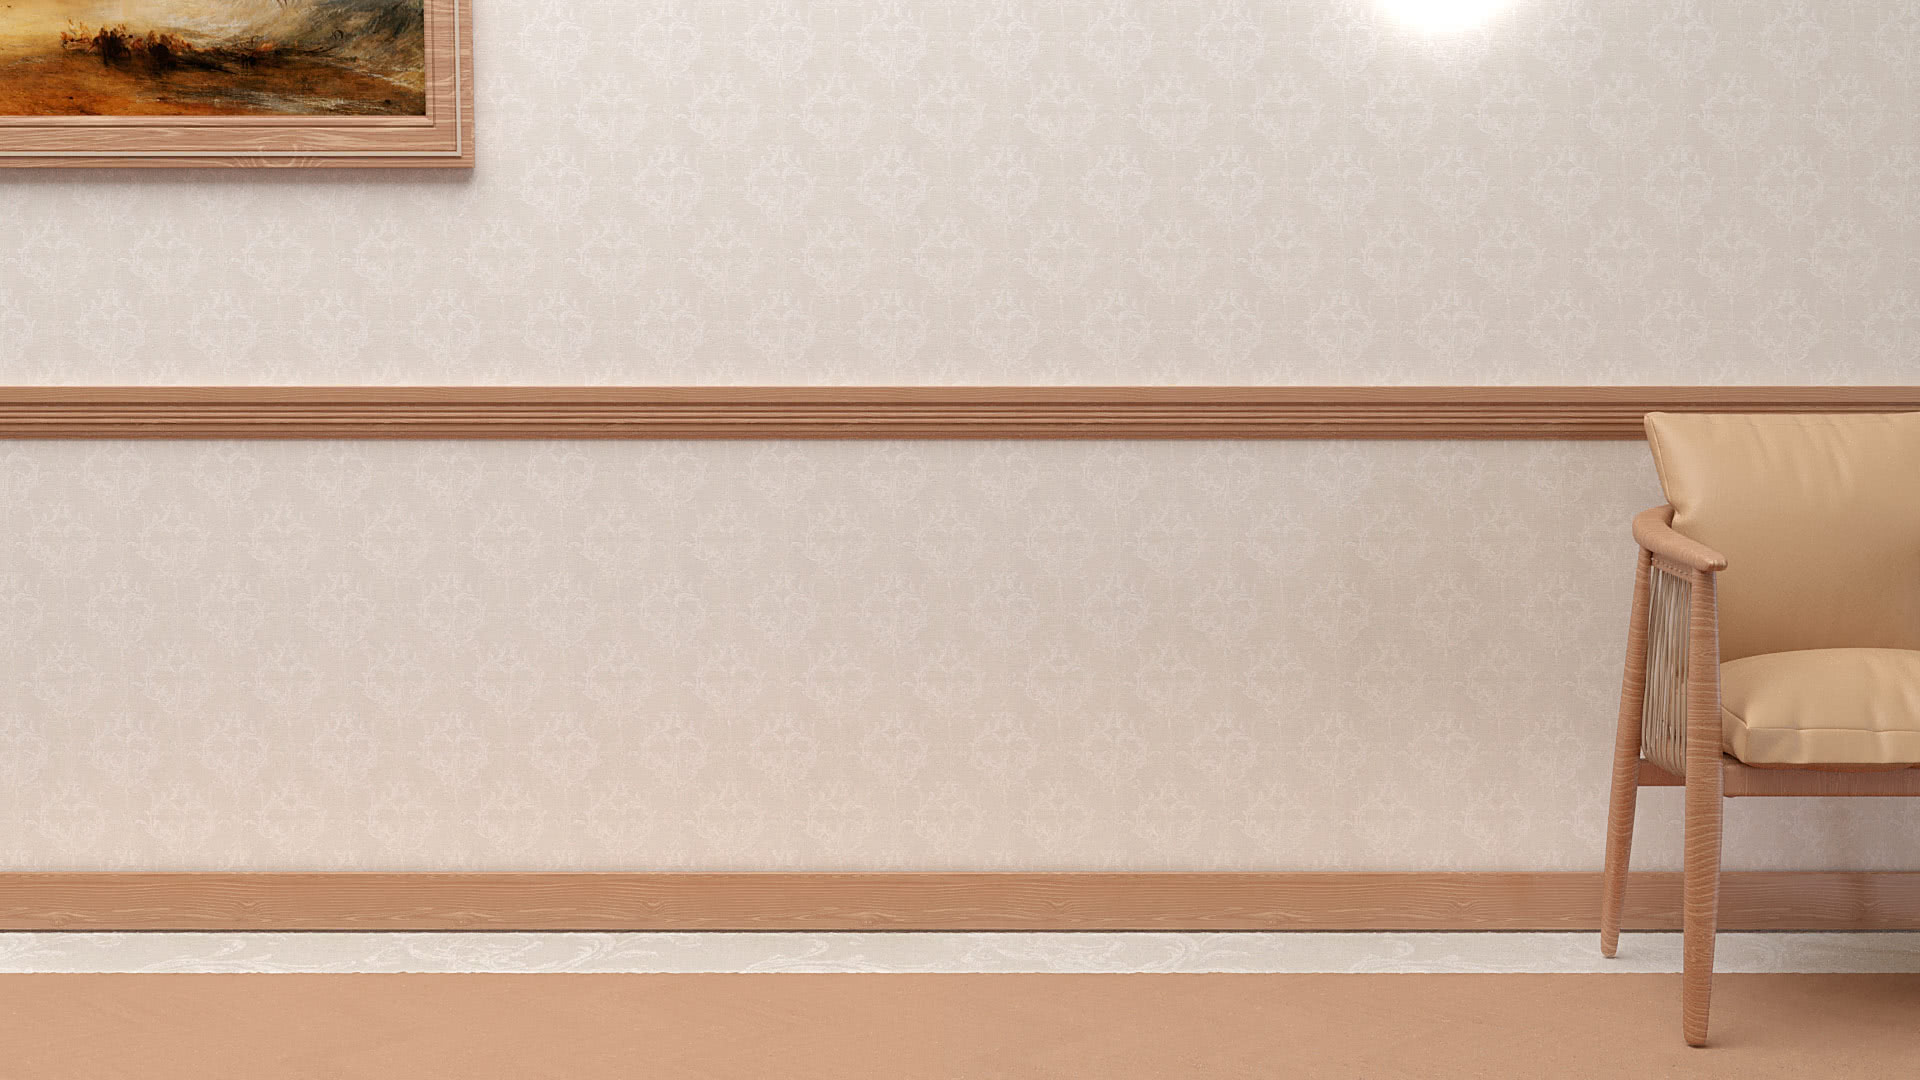
Defining the Purpose & Aesthetics Chair rail moldings, derived from 18th-century European design, were initially installed to prevent chairs from damaging plaster walls. Today, they serve more as a decorative element, enhancing the architectural detail of a room. Choose a style that complements your home’s existing decor, whether it’s traditional, contemporary, or somewhere in between.
Material Selection Moldings are typically made from wood, MDF (medium-density fiberboard), polyurethane, or PVC. Wood offers a traditional, warm feel but requires more maintenance. MDF is cost-effective and easy to paint, while polyurethane and PVC are durable, moisture-resistant options ideal for high-humidity areas like bathrooms or kitchens.
Planning Your Project
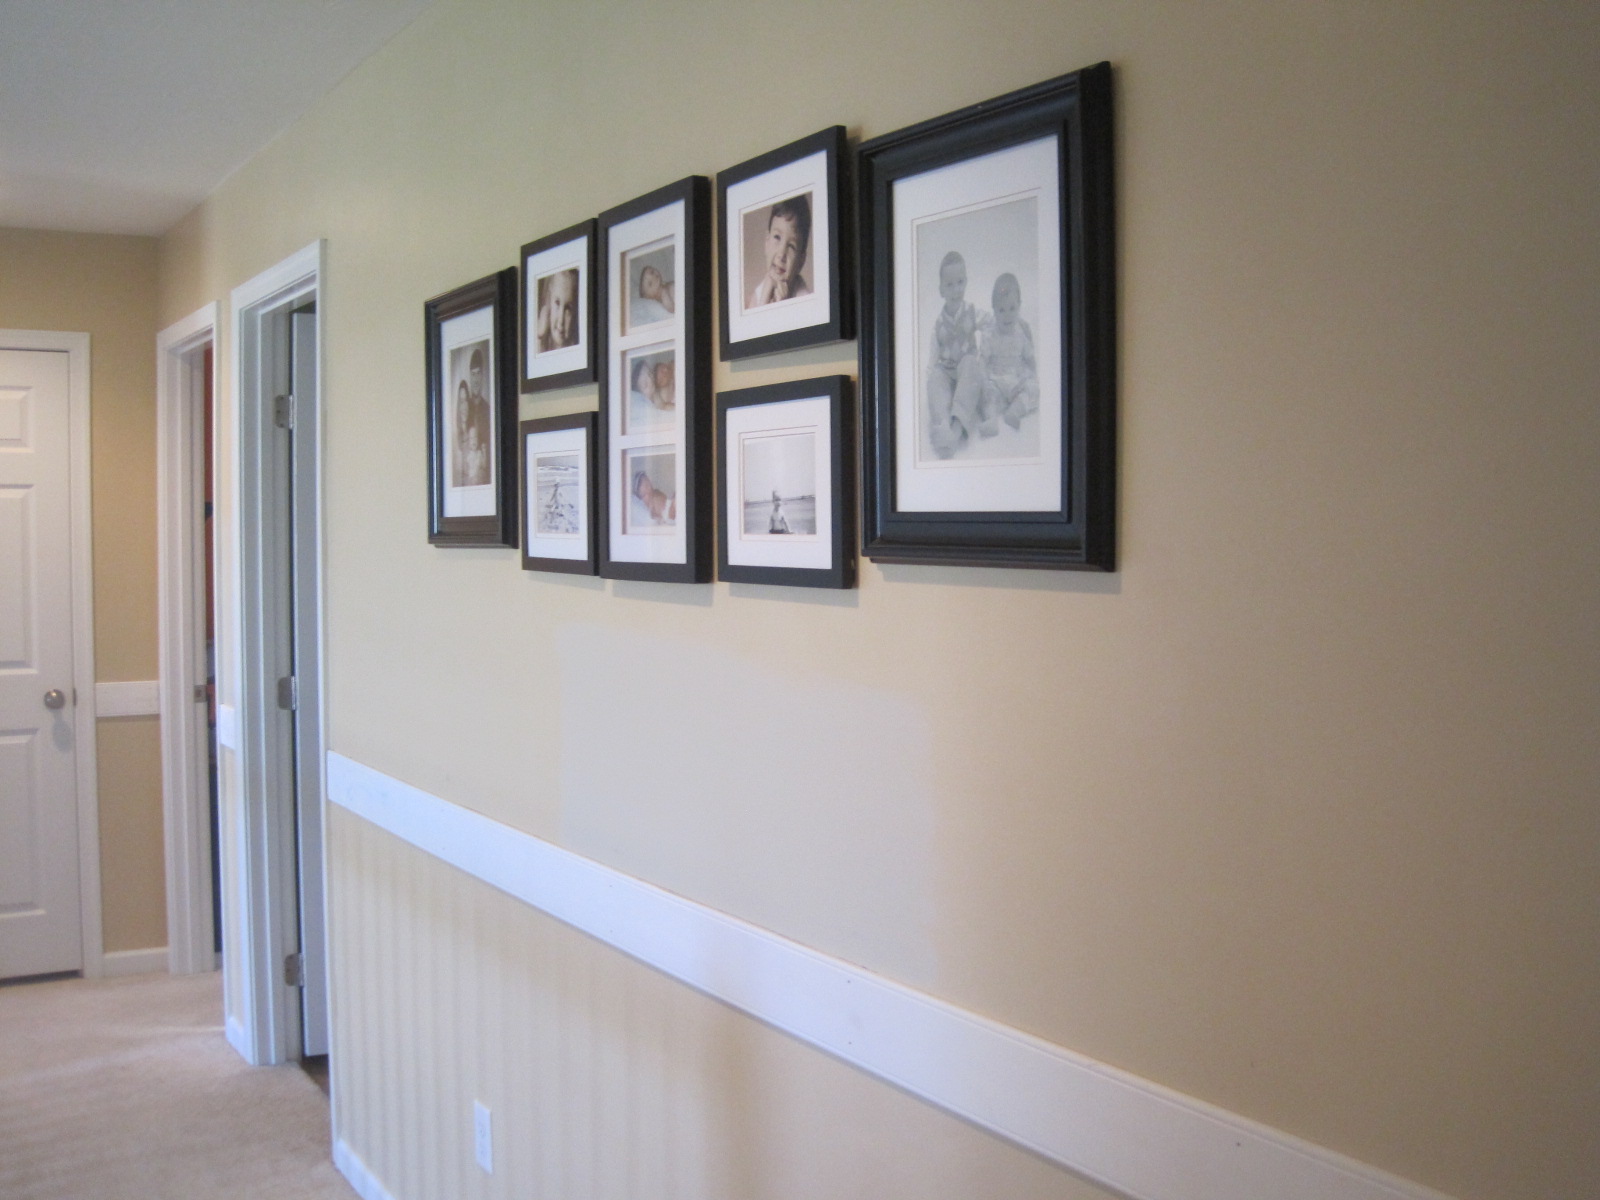
Measuring & Marking Begin by measuring the perimeter of the room where you intend to install the chair rail. Use a laser level or chalk line to mark a consistent height around the room, typically 32-36 inches above the floor, depending on ceiling height and personal preference. Ensure your marks are straight and level for a professional look.
Layout Considerations Consider doorways, windows, and corners when planning your layout. Decide whether you want the rail to stop at openings or continue seamlessly. Plan transitions and miter cuts accordingly to maintain a consistent flow.
Tools & Materials Checklist
Before diving into the installation, gather all necessary tools and materials:
- Measuring tape
- Level
- Stud finder
- Miter saw
- Nail gun or hammer and finishing nails
- Wood glue (for wood moldings)
- Sandpaper
- Caulk and painter’s putty
- Primer and paint
Installation Techniques
Preparation Clear the area of furniture and cover the floor with a drop cloth. Locate and mark the wall studs for secure anchoring.
Cutting & Fitting Using your miter saw, cut the first piece of molding at a 45-degree angle for the corner. Always measure twice and cut once to avoid waste. Fit the piece against the wall, checking for a tight seam at the corner and a level fit along the marked line.
Attachment Secure the molding to the wall using a nail gun or hammer and finishing nails, driving them into the studs. For added stability, apply a small amount of wood glue to the back of the molding before nailing. Space nails every 16 inches to ensure a firm hold.
Miters, Coping, & Inside Corners For inside corners, cut both pieces with a 45-degree angle, ensuring they meet perfectly. Outside corners require careful coping, where one piece is cut with a cope joint to fit precisely over the other’s mitered end. This technique ensures a seamless appearance.
Finishing Touches
Trimming & Caulking Inspect each joint for gaps and use painter’s putty or caulk to fill them, creating a smooth finish. Sand any excess filler once dry for a flawless surface.
Painting or Staining Prime the molding before painting or staining to ensure even coverage and enhance durability. Choose a color that either matches your existing trim or creates a striking contrast, depending on your design goals.
Maintenance & Longevity
Protective Measures To preserve the beauty of your chair rail, avoid harsh cleaning chemicals and opt for gentle dusting or wiping with a damp cloth.
Enjoying the Transformation With the project complete, step back and admire how this simple addition has elevated your room’s aesthetic. Chair railing not only protects your walls from scuffs and dents but also imparts a touch of timeless elegance, making your space feel more refined and inviting.

Choosing the Right Profile for Your Chair Rail Molding
Selecting the perfect profile for your chair rail is a crucial step in achieving the desired aesthetic for your space. Molding profiles range from simple and clean to ornate and intricate, each evoking a distinct style. Here are some popular profiles and the design aesthetics they complement:
- Simple Bevel or Colonial: Characterized by a straightforward design with a single sloping edge, these profiles work beautifully in modern and transitional homes. They offer a subtle touch of elegance without overwhelming the room.
- Dentil: Recognizable by its series of rectangular blocks spaced out along a band, dentil molding hails from classical architecture. It adds a sense of grandeur and tradition, fitting well in formal dining rooms or traditional-style homes.
- Ovolo: With its smooth, rounded top edge, ovolo moldings are versatile choices that suit both traditional and contemporary settings. Their soft curves add depth and interest without being overly ornate.
- Cyma Recta: This profile combines a concave curve (cavity) with a convex one (ovolo), forming an ‘S’ shape. It’s a more elaborate choice that enhances the elegance of formal spaces, such as living rooms or studies.
- Custom Profiles: For a truly unique touch, consider having custom moldings designed to match specific architectural elements in your home. This route allows for a tailored look that complements your home’s existing character.
When deciding on a profile, consider the existing architectural details in your home, your furniture styles, and the overall aesthetic you wish to achieve. Don’t be afraid to bring home samples to test against your walls and in different lighting conditions before making a final decision.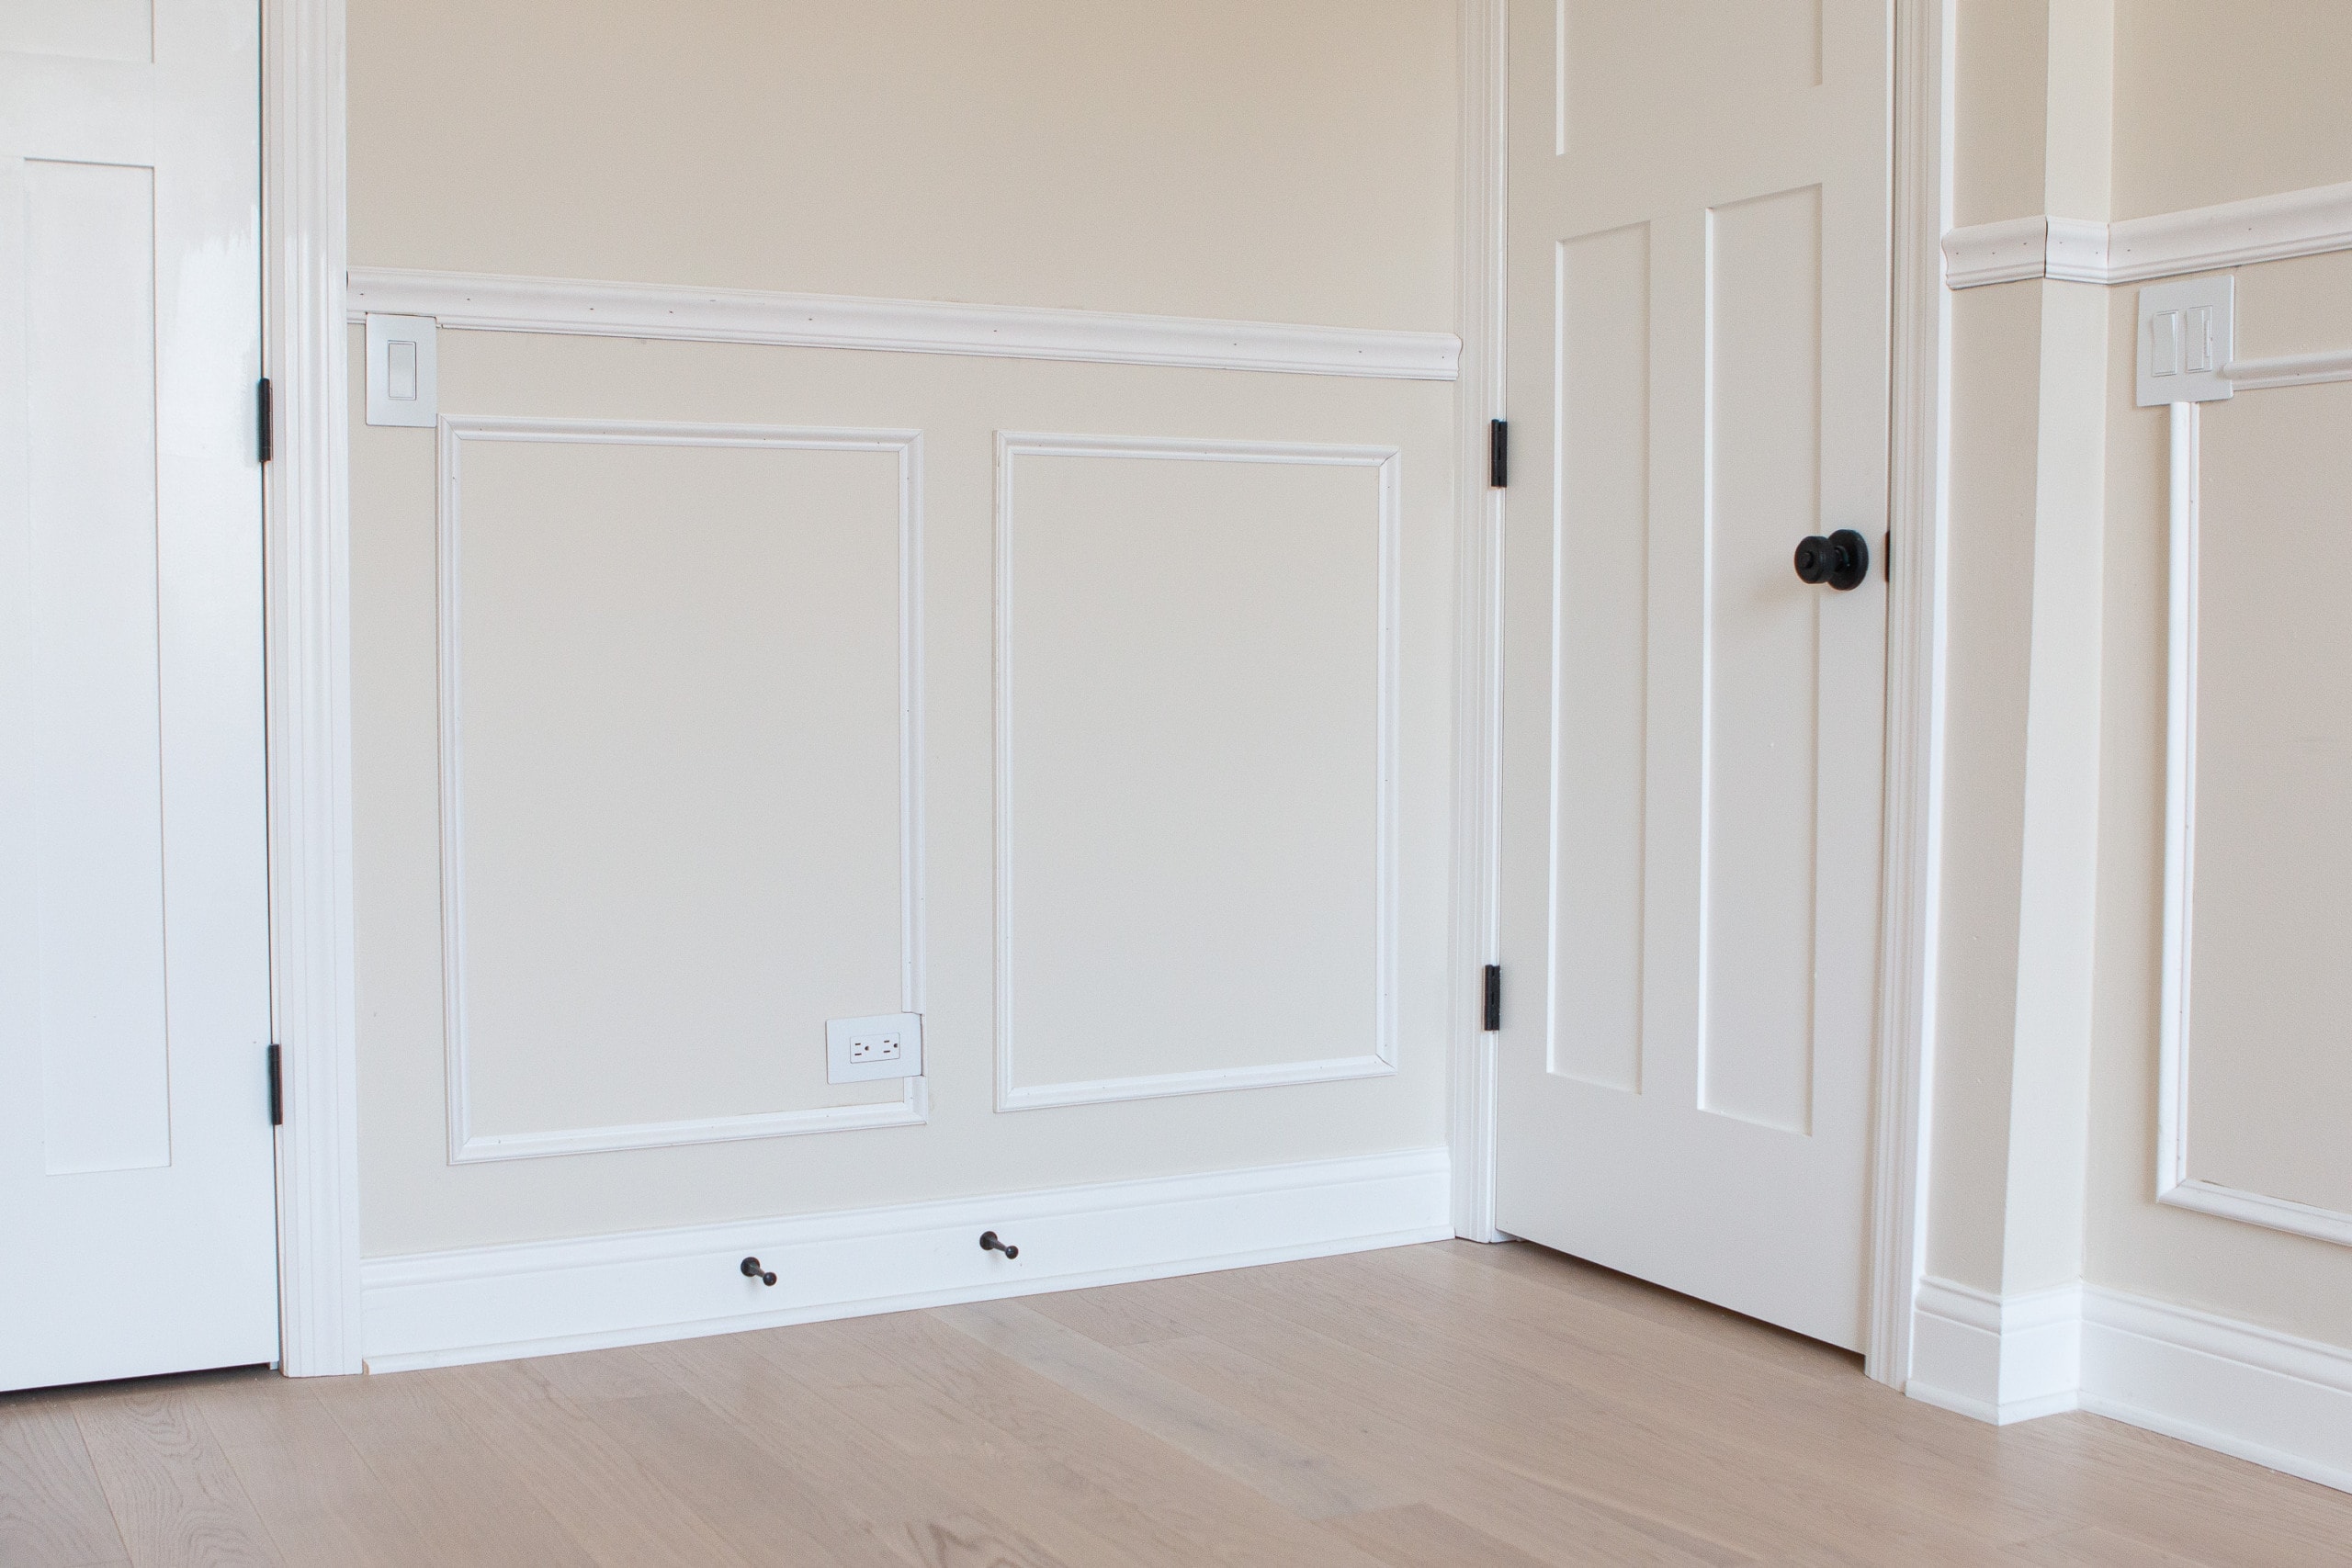
Color Matching & Contrasting Strategies
The color you choose for your chair rail can significantly impact the room’s visual appeal. Here are two primary strategies to consider:
- Matching Trim: For a cohesive and classic look, match the chair rail to your existing baseboards, window casings, and door frames. This approach creates a seamless flow throughout the space and is particularly suited for traditional interiors.
- Contrasting Accents: To make a bold statement or add visual interest, opt for a contrasting color or finish for your chair rail. For instance, a white chair rail against dark walls creates a striking outline that defines the space. Contrasting colors work well in modern and eclectic decors, allowing the molding to stand out as a feature rather than blend in.
When considering contrast, think about the room’s color palette and how the chair rail can enhance or balance it. You might also introduce a complementary color or a tone that picks up on an accent piece in the room, tying the design together.
In conclusion, chair railing installation is a DIY-friendly project that yields significant visual impact. By carefully selecting materials, meticulously planning, and executing precise cuts and finishes, you can create a sophisticated ambiance in any room of your home. With this guide as your companion, you’re well-equipped to undertake this transformational endeavor, adding both function and beauty to your living spaces.